Thank you for checking in to see what we have been making in art!
Students in the Fall 2018 3-D Art Elective began by finding a partner and choosing an extinct or endangered animal to represent in sculptural form. We discussed internal structures, fleshing out the form, paper mache, and painting for texture. Alongside this goal, students were expected to gather information about their animal and possible causes for its status, connecting their physical creation with deeper thinking about sustainability, responsibility, teamwork, and environmental awareness.
Enjoy
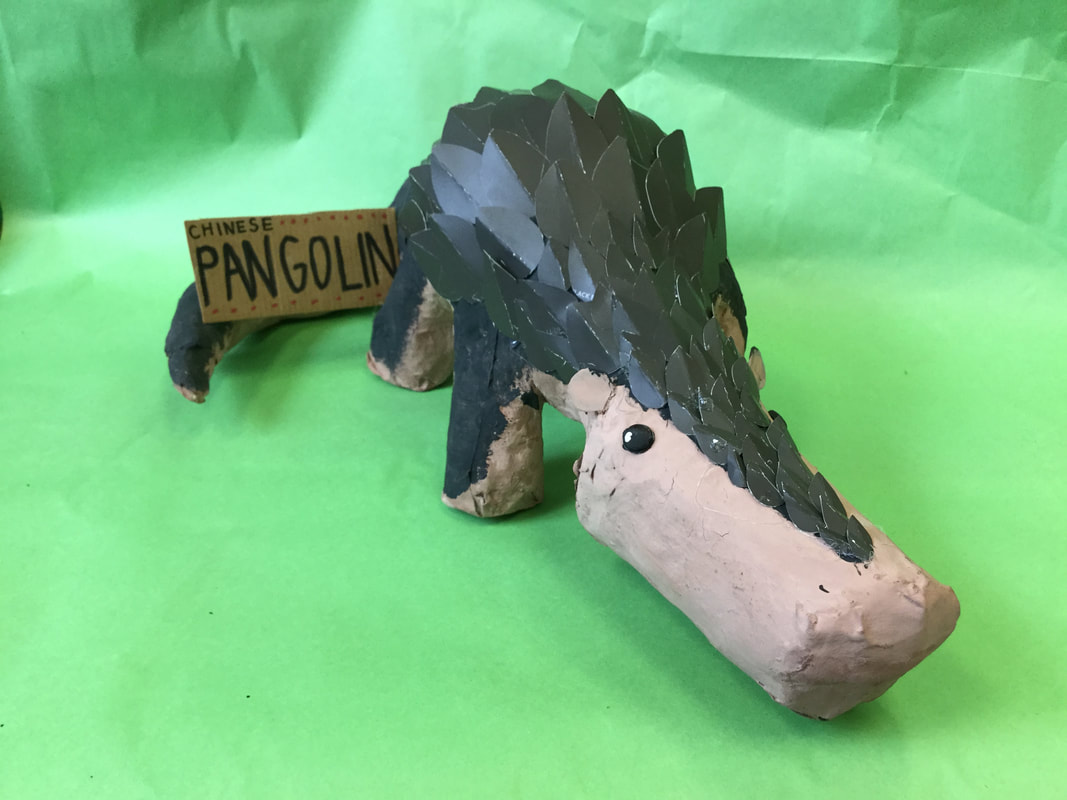
Chinese Pangolin by Ava & Willow
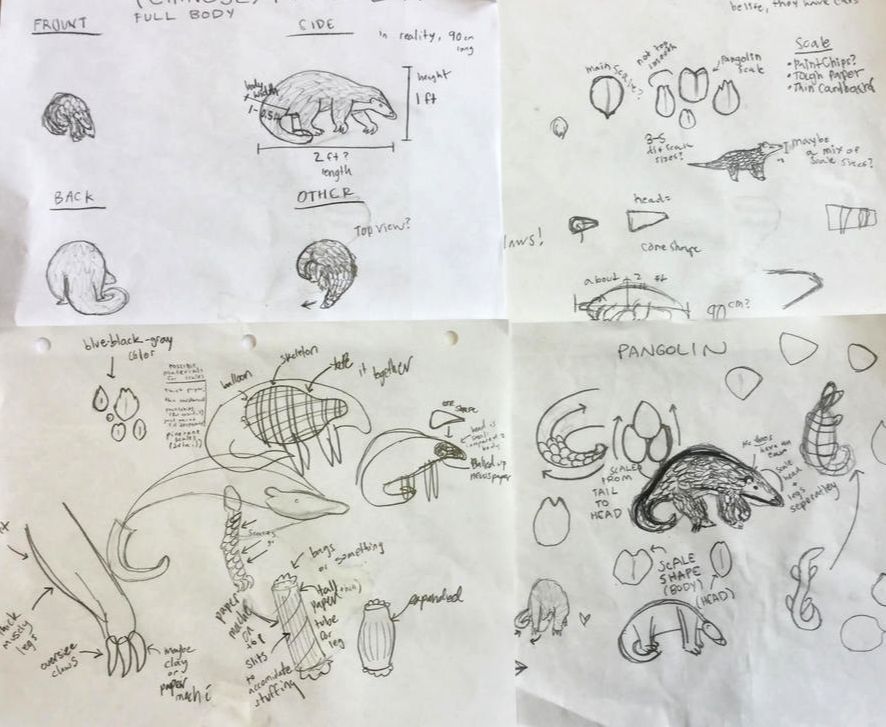
Our animal is the chinese pangolin. It is endangered because it is one of the most trafficked animal in the world. That’s why we decided to do a pangolin. The pangolin is from the Asia region and the species we picked is specifically from China. Pangolins are similar to anteaters and armadillos in diet and looks, with the exception that instead of fur or plates, they have scales.
|
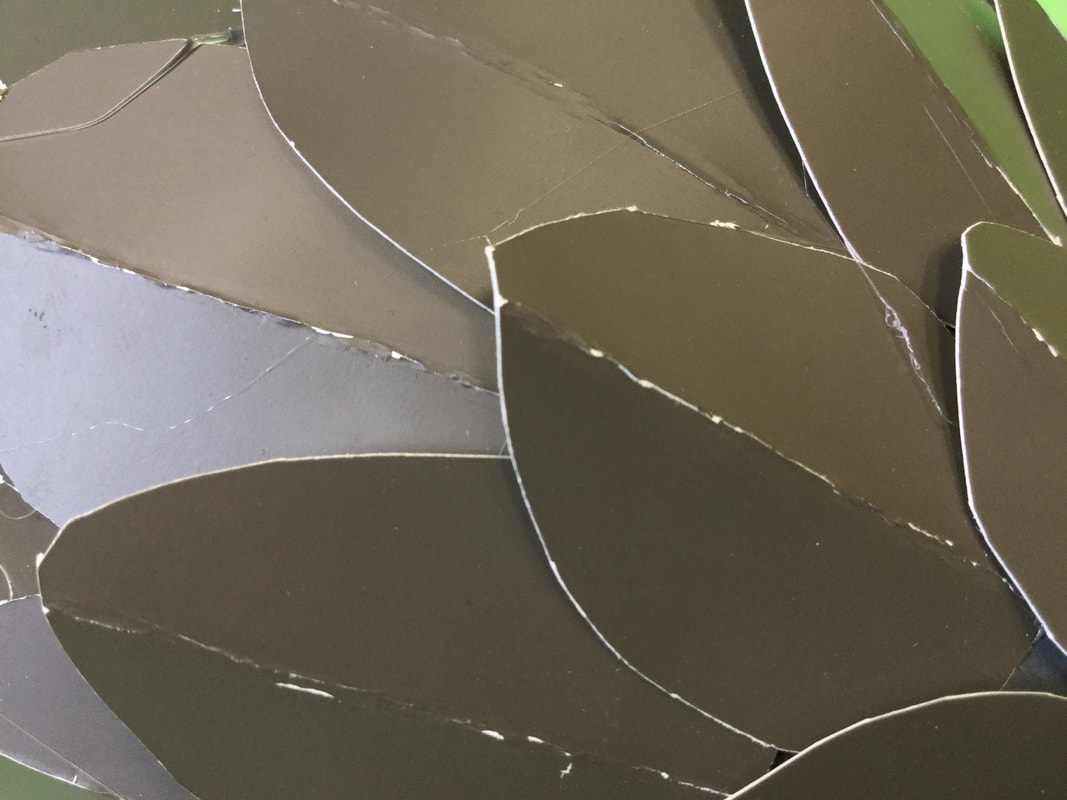
For our process we first sketched out the pangolin from four different views, just to get an idea of what the animal looked like, its shape, and how we would make it. Then we made a skeleton for it using wire, tape, balloons, a cup, and cardboard. We then covered the skeleton in tape and paper-mache. We painted it, and it was very hard to mix the tan-pink. Then we stole all the paint chips from Lowes to make scales for our pangolin, we wanted it to have real scales instead of just painting them on.
We feel pretty satisfied with how our pangolin looks. It’s cool. “Its funky. Its hip with the jive. Its groOovin’”, says Willow. Fun Facts About Pangolins
|
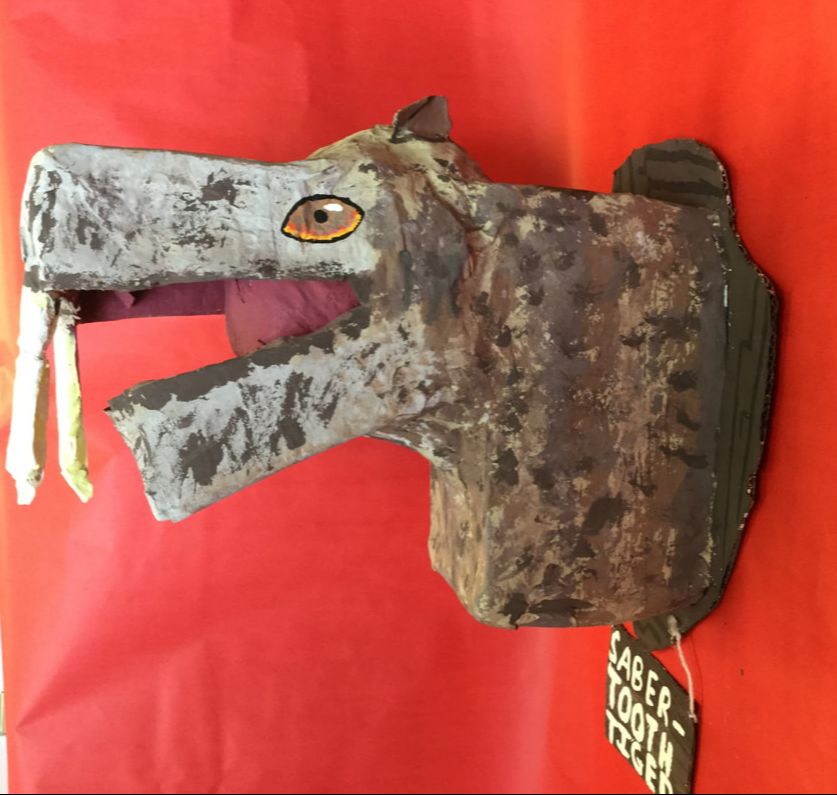
Saber Tooth Tiger by Johana & Sabrina
We wanted to get our head mount to be as close to the life size head as possible. We wanted to show the big mouth and the fur. Our animal is different because the saber tooth tiger is roaring and showing its teeth. The saber tooth tiger was from South America. They also roamed the western parts of the U.S. The saber tooth tiger went extinct around 12,000 years ago.
Our first step was picking the animal. Sabrina had the idea and we both liked it. Next we looked up the animal and studied the features. We both sketched out all the different sides, (front, back, above the head, and behind). Next we started to make the skeleton of the animal. We took boxes, rounded the corners and bulked up the animal with newspaper. The head was made out of newspaper squished together. We made paper mache out of water and flour combined and we covered our animal in the mache. It took a few art classes to do that. We painted the structure with colors that we thought were similar to the saber tooth tiger and dry-brushed over, to make a good texture. We both learned how to dry-brush our animal.
We think we made this project because animals going extinct is important to know about. Even though people might think that there is a lot of a certain kind of animal, that animal could easily go extinct or endangered. Hunting animals is very bad for the environment unless an animal is overpopulated. If kids do projects like this, it will show grown-ups that taking care of animals matter.
|
Johana: My goals as an artist is not become and amazing artist but to become more confident in myself as an artist. I also hope to have more ideas in the future when I am doing an art project. I really enjoyed making things 3D and turning boxes into something else. I have more ideas in the future about making things 3D. Our saber tooth tiger only sort of came out how I was expecting it to be. I like the version that we made, better. The cool tricks that made our animal realish are going to be useful in the future. It was really fun doing this art project.
Sabrina: My goals as are to make accurate sculptures and statues for museums and research centers, also to make statues and sculptures for fun. |
Polar Bear by Maddy & Sophie
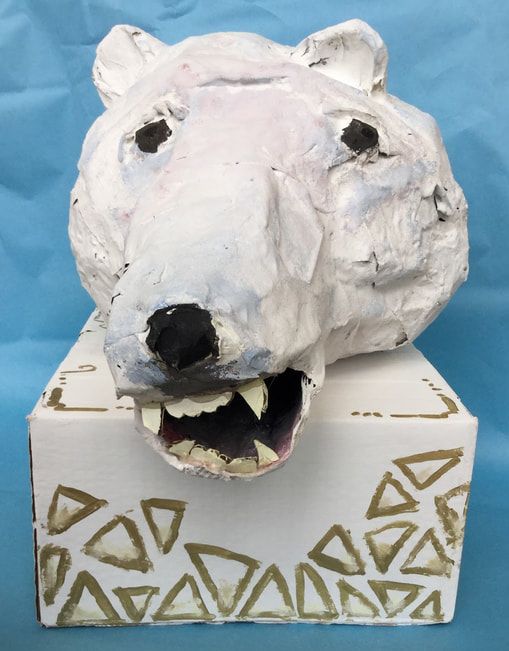
Our animal is a polar bear. It is endangered. We just focused on the head for this project. It has little ears, a big eyebrow bone and big brown eyes. As we were looking at pictures, we realized it has some blue undertones in the fur, so we tried to recreate that with different painting styles.
First, we sketched the different angles of the head, and looked at all of the different shapes we would need. Then we had to think about the structure and sturdiness. Then we covered it in paper maché, did different textures, and built up different parts of the face to create texture and dimension. We painted the fur by blotting with sponges.
It helped us gain skills and experience in 3D artwork. It also helped us learn about creative problem solving and fixing mistakes. The painting portion of the project was good practice with shading, undertones, and shadows.
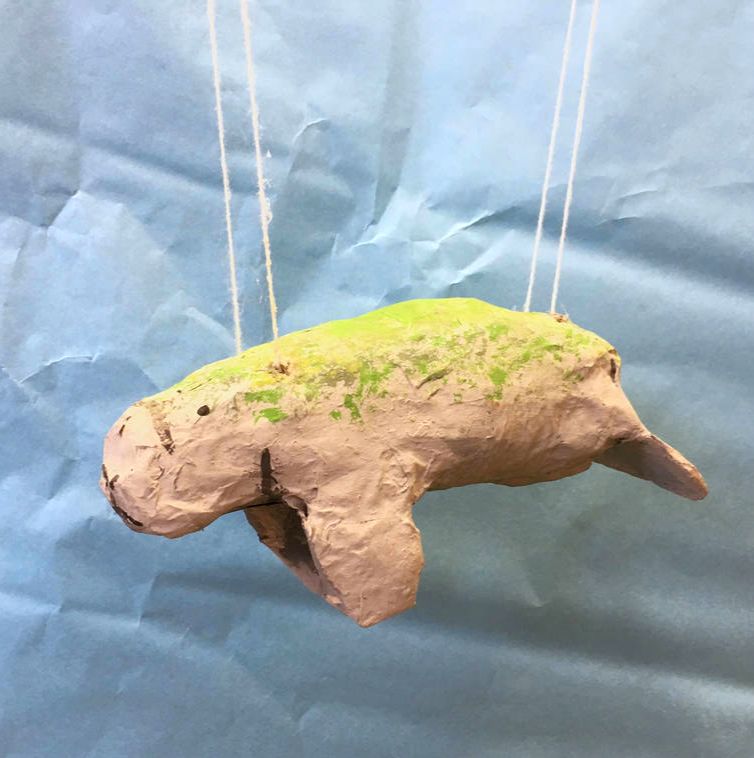
Manatee by Tommy and Calvin
|
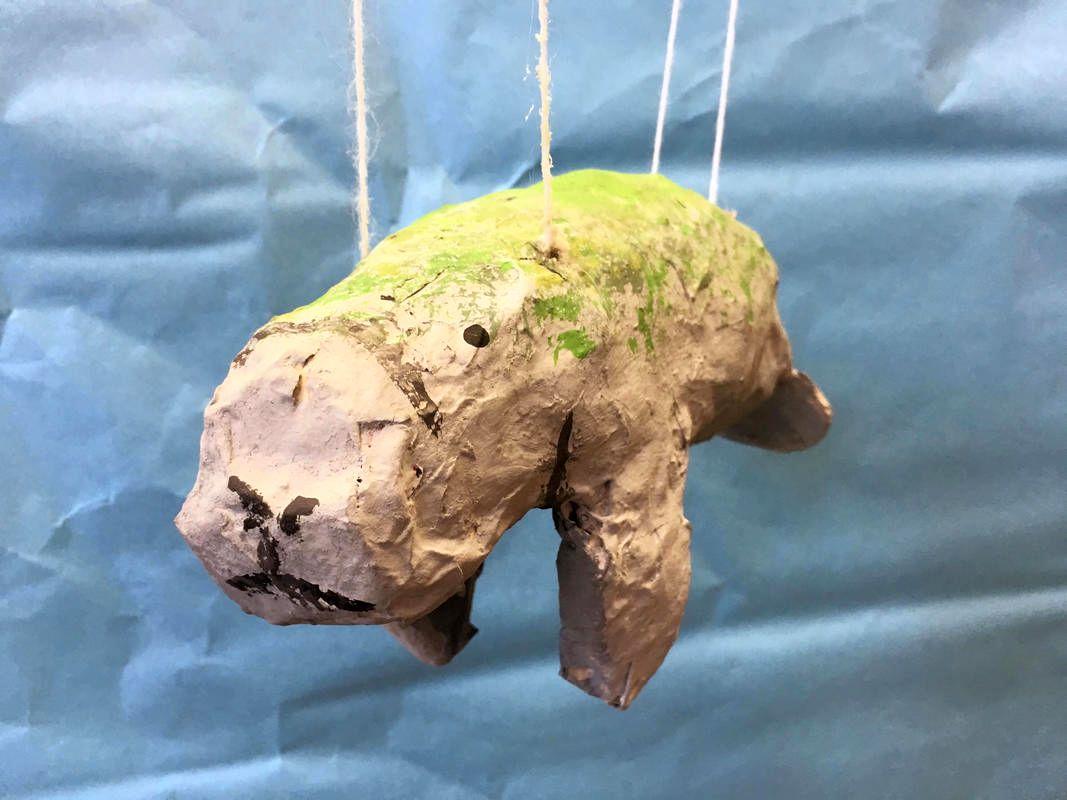
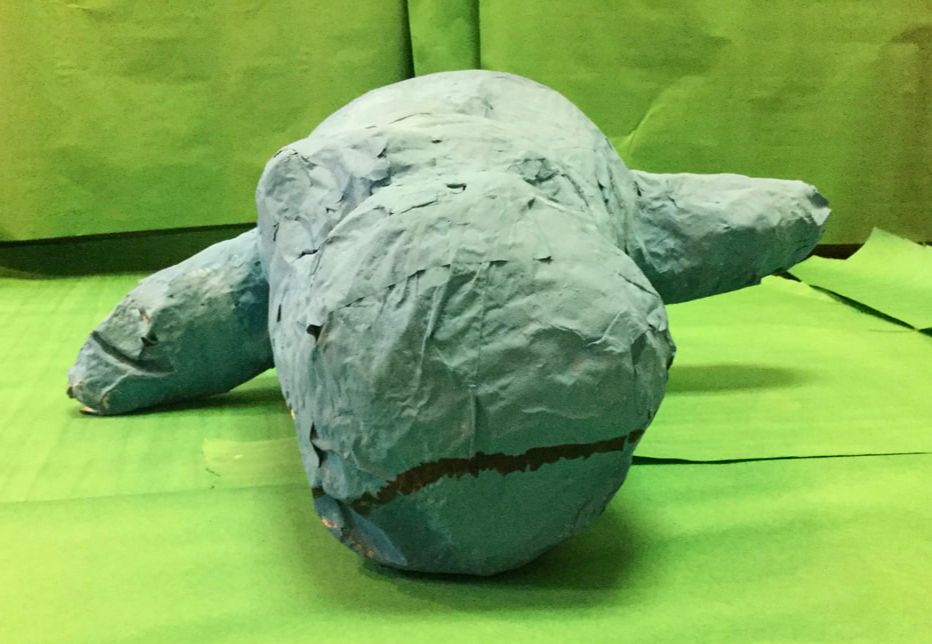
We made a manatee named Gregorny. He is smooth with some bumpy places, and a dappled coat of moss on his back. Manatees resemble a cross of whale and cow, and are common in warm waters near Florida. You can find manatees in most aquariums. They are endangered by hunting for their tough hides, meat, and blubber.
We began creating Gregorny by forming wire circles of previously determined diameters. Next we connected them into a skeleton using more wire. We wrapped his skeleton in several layers of tape before paper macheing him to make him into a smoother manatee. Then we created Gregorny’s skin. We used different shades of blue-gray paint to create complex highlights and contours. After his skin was finished we evoked the colors and textures of moss growing on his back. To do this we used a round brush to drybrush on 3 different shades of green paint, creating a natural and irregular look. In our opinion the big idea here is simply caring. We need to care about our actions and how they affect our surrounding environment, or else we and other animals will face some seriously trying times in the decades ahead. We also need to care about ethically and sustainably sourcing the food, cosmetics, and other things we consume. Killing manatees for their skin does not fit these ideals. |
|
Gregorny turned out about how we thought he would. We learned the skills needed to construct the wire skeleton, proper paper mache technique, and how to drybrush. Overall we are satisfied with Gregorny and what we learned from making him.
Quagga by Tate and Tayu
|
|
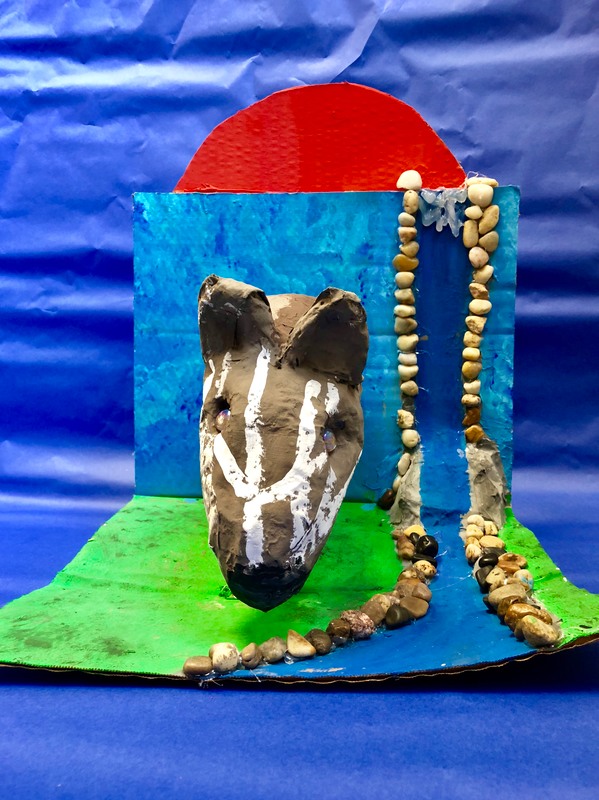
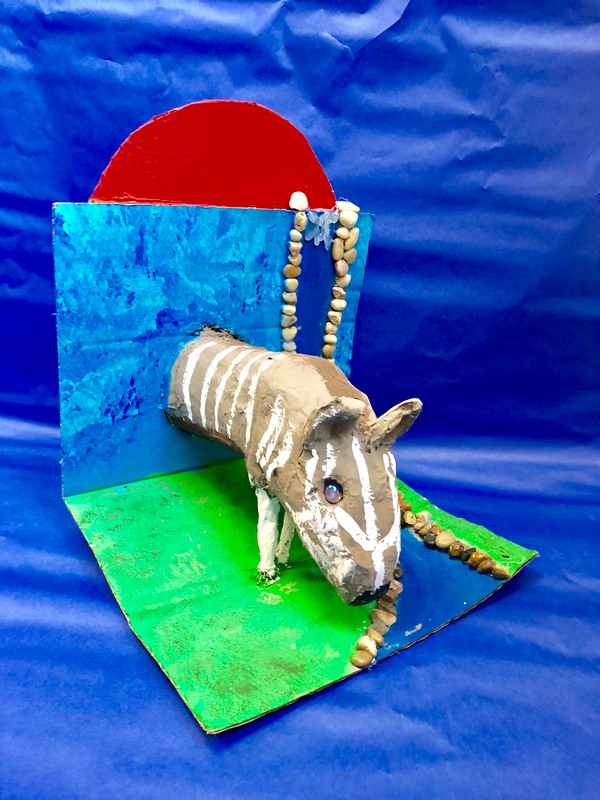
The Quagga is a hybrid between a horse and a zebra. They are brown with white stripes. The Quagga is extinct and it used to live in Africa.
First we took a cardboard box and shaped the body of the Quagga. Then, we filled the body frame with newspaper. Next, we made the head from newspaper. Then, we put on paper mache. Finally we painted the Quagga and added details such as rocks, and the background. We had to consider the dimensions of the animal and then make it approximate model of the Quagga. We learned about dry painting and using different items to create different textures.
We made the Quagga because it seemed like a challenging project. The painting, shaping, making the textures, all of this would be challenging and this is why we chose to make the Quagga. We think this Quagga could represent peace, as the Quagga is eating grass by a waterfall, We think that this is very peaceful.
Tayu’s goals: To learn to forget perfection and learn to have fun, while also to create works that look good.
Tate’s goals: To become better at realistic painting, and to be able to construct models that look realistic.
We learned that everything will not work out as expected. It turned out the way we expected
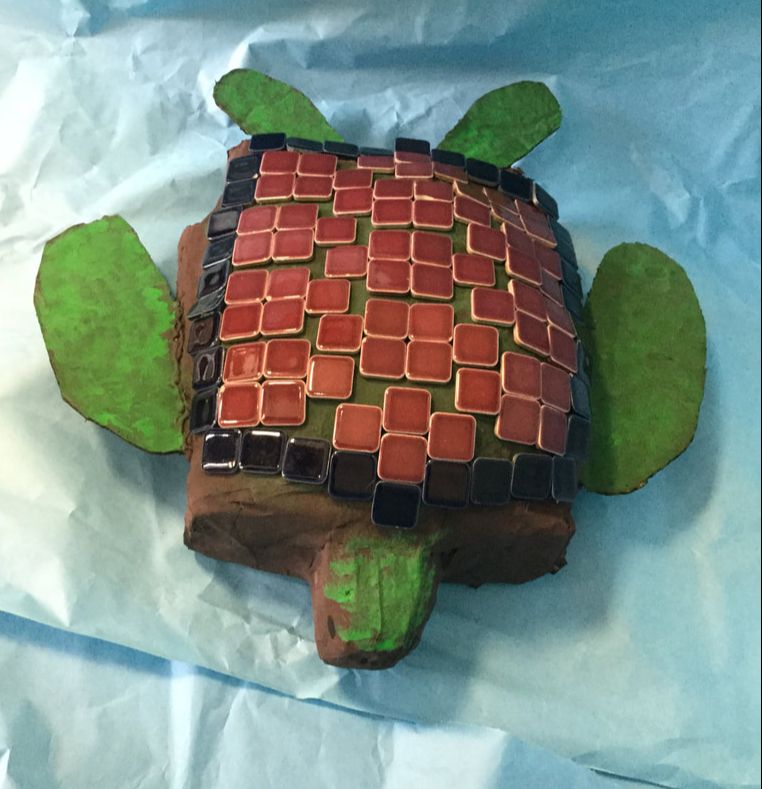
Sea Turtle by Maggie and Avik
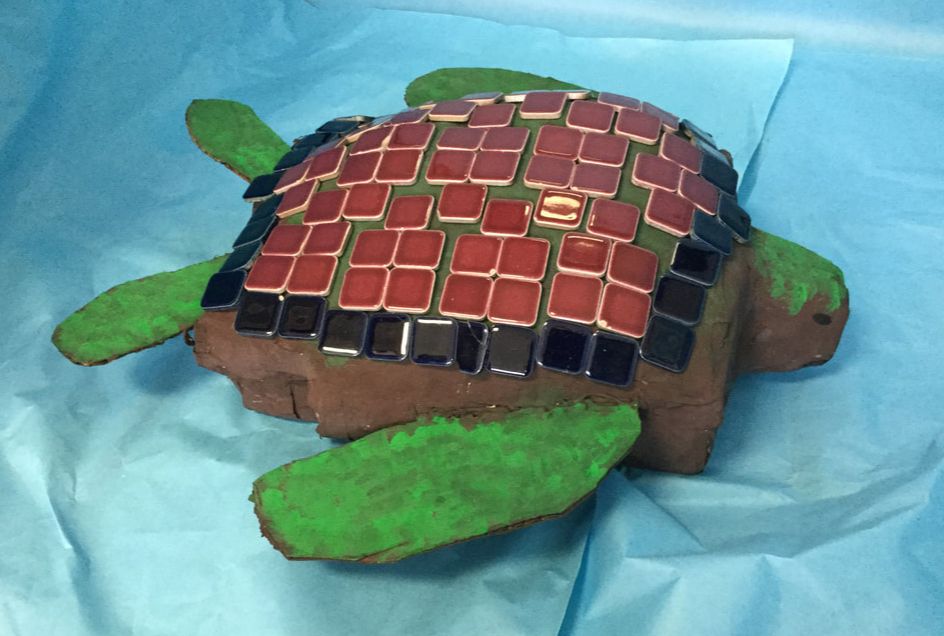
In 3D Art this quarter, we selected the sea turtle as the animal for our project. The sea turtle partially resembles the tortoise, which it is related to. Its main colors are brown, white and green. It has unique sloped fins, and a rounded head. The body’s roundish shape and its unique yet easily recognizable shell are features that easily set it apart from other animals. The sea turtle is currently endangered, mostly as a result of climate change and ocean pollution.
The base of our sea turtle art project was a cereal box, which acted as a temporary torso for the turtle. We soon attached paper cups to the sides of it to help shape its shell, which also served as temporary front flippers. For the back flippers, we used smaller plastic cups. The cups were later replaced with cardboard we hot-glued to the box to have the flippers appear more flat and wide, and to resemble actual sea turtle flippers better. We tried pushing in the corners of the box to give it a more curved shape, in order for it to appear more like a real turtle shell. We then added paper mâché and newspaper to elevate the shell, and to get it ready for painting. After applying the paper mâché, we started painting over it with the base color we chose- a slightly reddish brown. We created the color by mixing red and green paints, as well as a mild portion of yellow. The way we created it helps set to set it apart from flat 2-dimensional artwork. We think that the 3-Dimensional shapes helped bring it to life more.
The base of our sea turtle art project was a cereal box, which acted as a temporary torso for the turtle. We soon attached paper cups to the sides of it to help shape its shell, which also served as temporary front flippers. For the back flippers, we used smaller plastic cups. The cups were later replaced with cardboard we hot-glued to the box to have the flippers appear more flat and wide, and to resemble actual sea turtle flippers better. We tried pushing in the corners of the box to give it a more curved shape, in order for it to appear more like a real turtle shell. We then added paper mâché and newspaper to elevate the shell, and to get it ready for painting. After applying the paper mâché, we started painting over it with the base color we chose- a slightly reddish brown. We created the color by mixing red and green paints, as well as a mild portion of yellow. The way we created it helps set to set it apart from flat 2-dimensional artwork. We think that the 3-Dimensional shapes helped bring it to life more.

|
|
I think the reason we made endangered animals for the project of this quarter was to teach the students in the class more about real life animals, and to help raise awareness to a large group of people about endangered animals. This project could also help inspire others to pay attention to the way wildlife and the environment are treated and the consequences of treating them poorly, and could help people know which ones are endangered. This project has helped us learn to shape things, and how much work and effort can go into even a small or simple piece of artwork. It helped teach us about painting, textures, paper mâché, projects, cooperating with others, and 3D artwork in general.
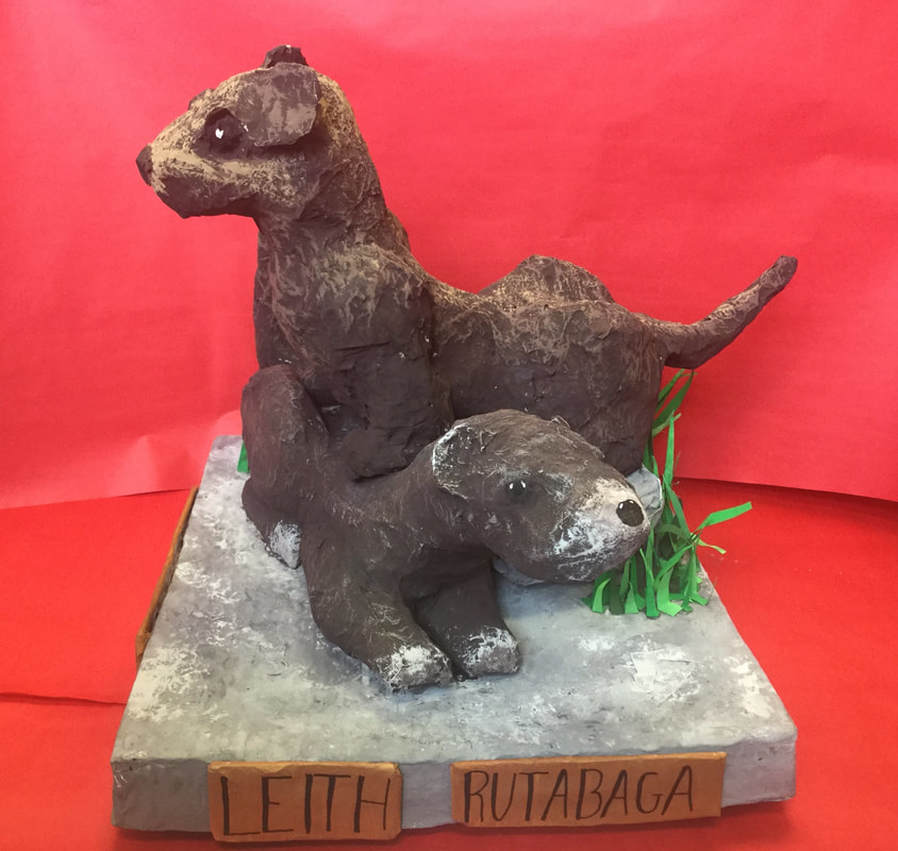
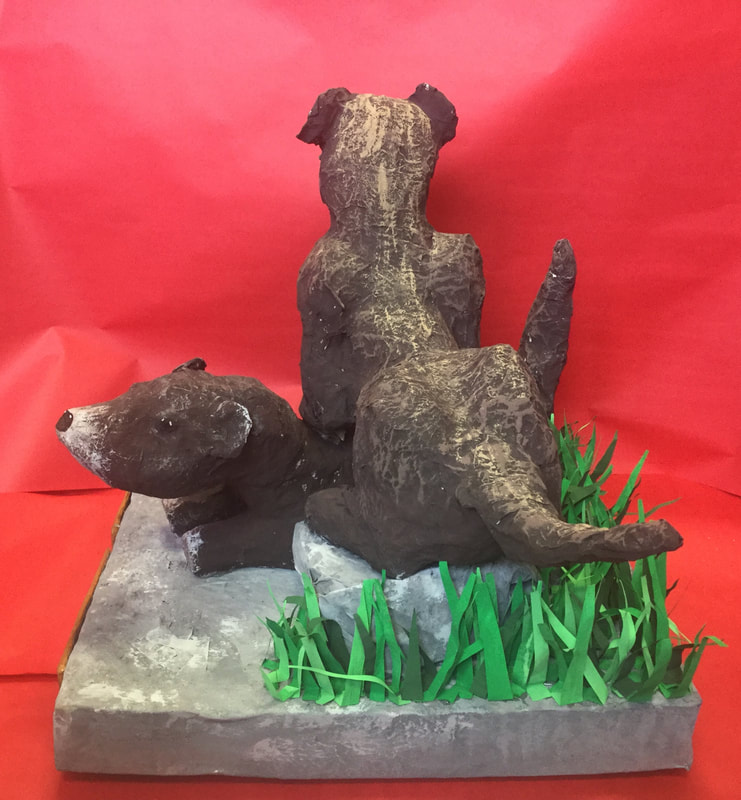
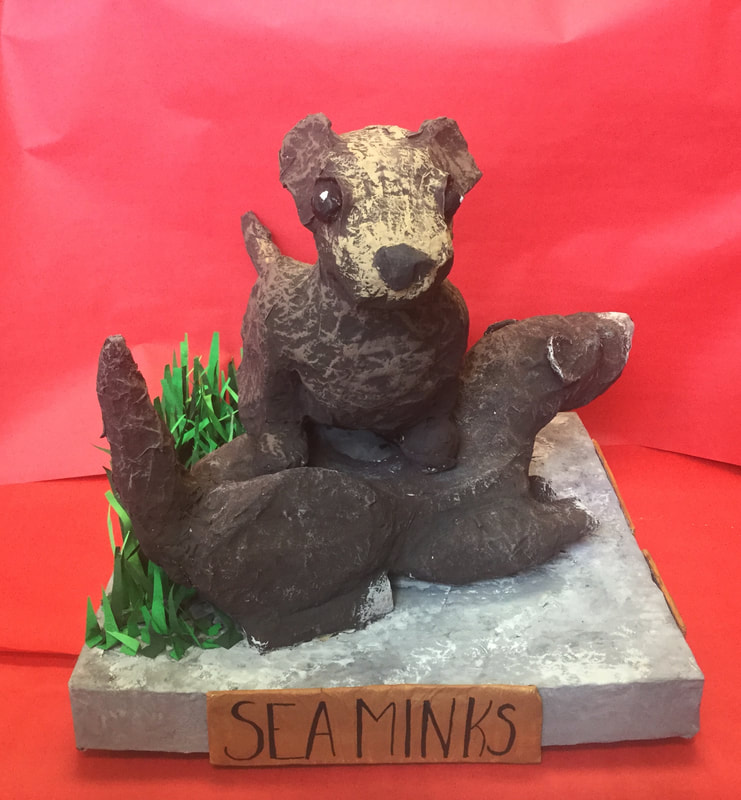
Sea Minks by Phi and Elliot
|
We made a sculpture of two sea minks. Sea minks are extinct. They used to live in North Carolina but they were hunted to extinction for their fur. Sea minks look a little like otters. They have brown fur, a long thin body, and a triangular face with beady black eyes.
To make the sea minks, we first covered egg cartons with news paper and tape to create a “skeleton”. Once the “skeletons” looked a little like minks, we paper mached them. When the sea minks were paper mached we realized that they didn’t line up correctly, so we had to put a paper rock underneath one of them. Last, we painted them with tempera paint to make the texture of their fur and the rocks and added some grass. Making sculptures of the sea minks was very different than if we were to just draw them on a piece of paper. We had to consider what each part of the sea mink looked like and we had to figure out how to make each side of the sculpture look good instead of just one. In some ways though, it was easier to make a 3D piece than to make a 2D one because we didn’t have to worry about shadows or making it look 3D. Sea minks are extinct. They went extinct in 1894, after being hunted for their furs. Their closest living relative is the American Mink. By making the paper mache sea miks we could bring “life” to a sea mink again. Hopefully, when people look at our sea mink sculpture they will feel inspired to help conserve other species of animals that are endangered. Working on this project helped us get better at using paper mache and making 3D art. We also learned a lot about painting, like how to paint fur and how to paint rocks. |
|
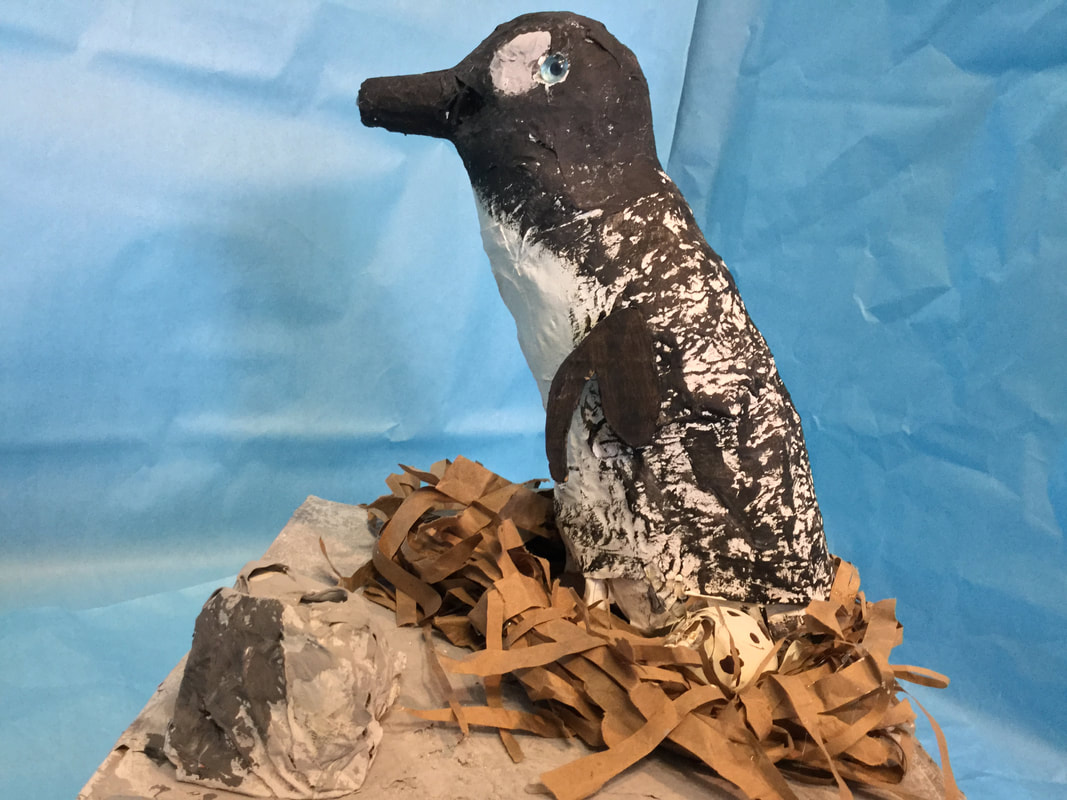
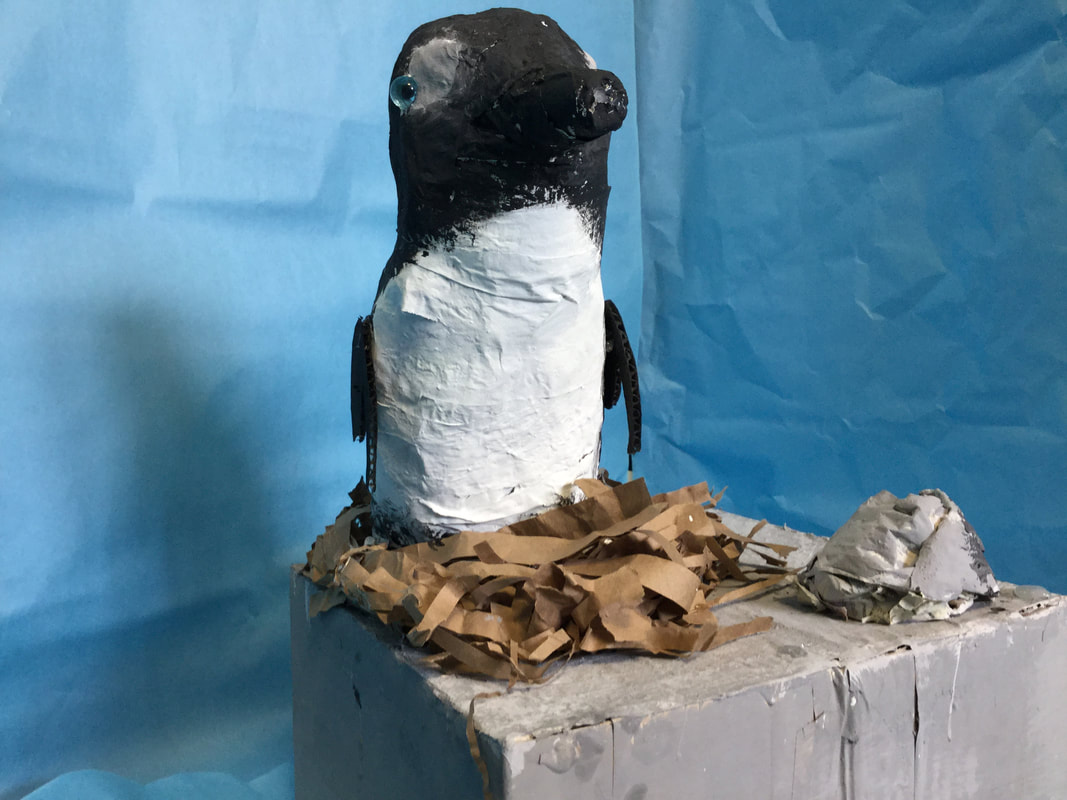
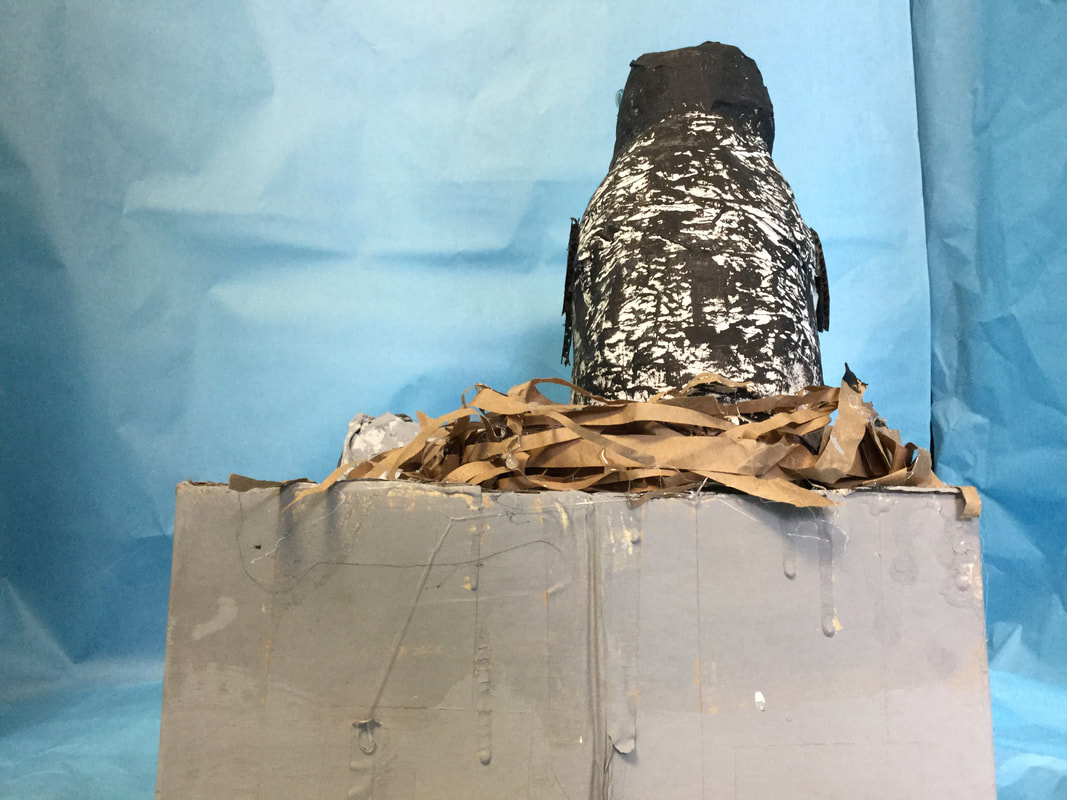
Great Auk by Evan & Joe
|
The Great Auk looks like a pelican or a penguin with a black back and white stomach. It has a entirely black head with two white spots right in front of the eyes. It has a black beak that is very elongated and slim. The body is very streamlined and smooth, with natural looking curves around the head. The Great Auk is extinct due to the mass hunting from the first settlers of the Americas. It is set apart from other animals like it with the entirely black head and beak; most other animals like it have yellow beaks.
We started with two plastic jars for the base of the body, then we put a wireframe on top of the jars and used newspaper to fill in the head then we paper mâchéd the body and head. After putting paper mâché on the head to give an attaching point we put the beak on the front. We then realized that our bird just looked like a giant cylinder and so we took him and tilted him forward then put a base on it to flatten the bottom, we then attached feet to our bird and put him on a base of cardboard boxes. After painting the first few layers we glued some strips of paper onto the base to make a nest, we proceeded to put an egg in the nest. We then dry brushed the back to give it texture and put some wings on our bird. We had to think about what it looks like from all the angles, we learned that you need many layers of paint to make a good painted object. We made the Auk because all the other animals we wanted to make were already taken. We chose this bird because it was really the only choice we had left on such a short notice and was the most interesting to us. I think our project could tell people to not kill off as many of certain animals because the Auk was made extinct due to over hunting. |
Our goals as artists are to work on overall skills such as paper mâché, dry brushing, and other techniques. We would like to learn general skills to become better artists especially at working on building animals like the Great Auk.
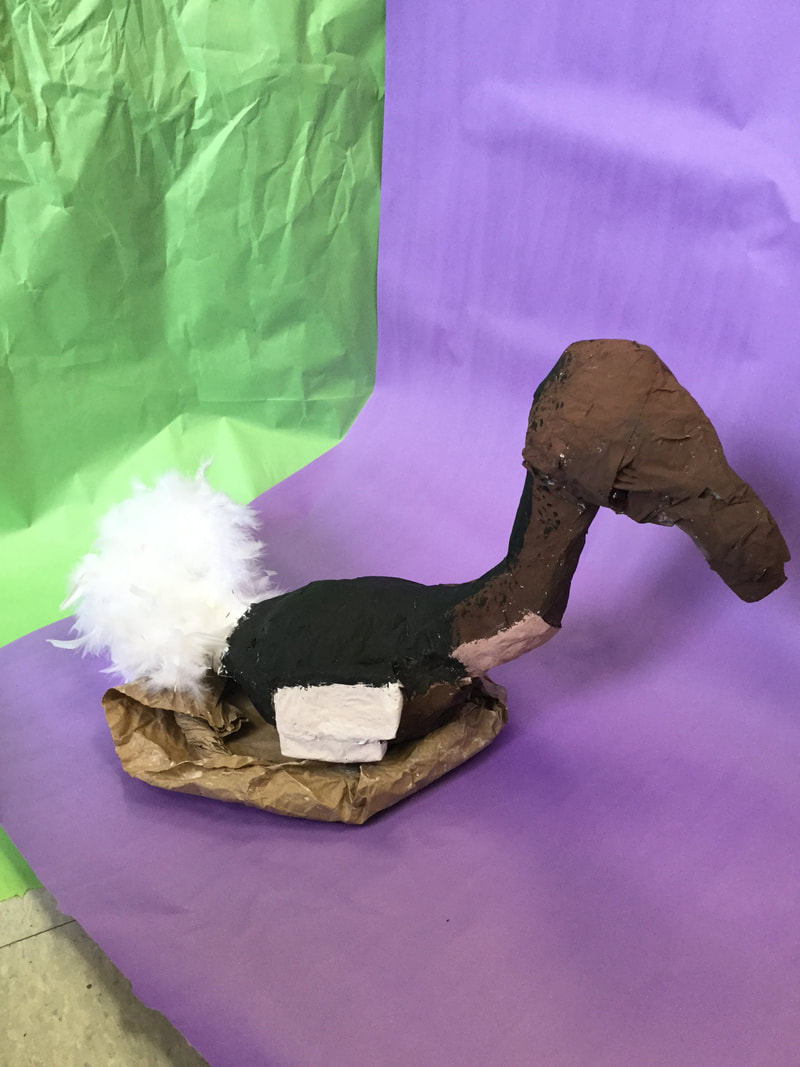
Dodo by Doni & Jack
|
|
We both really enjoyed this art project, and learned not only about art and its many styles but of the history of the dodo bird. It was really quite interesting. We learned that it went extinct in 1662, and it lived on the island of Mauritius, which is a small nation off of the east coast of Africa. The dodo bird is related to pigeons and doves, but was most closely related to the Rodrigues solitaire, which went extinct in 1778.
Making the dodo bird was the most fun part, although we were a little rushed at times. We started with an internal structure, made of cardboard and newspaper. Then we started to papier-mâchéing the dodo. The hardest part was making the neck, because we had to reinforce it multiple times to get it to stay up. After we finished papier-mâché, we started painting. We only had primary and secondary colors, as well as black and white, so we had to learn how to make our own brown. We learned that if we mix colors that are opposite of each other on the color wheel (e.g. blue and orange) then it makes brown.
In my opinion, it was important for us to do a project on extinct and endangered animals to bring awareness to animal rights, and to try and prevent poaching and trophy hunting. This art project, if done by enough people, could make a serious impact to animal rights, and could save many endangered species.
Our goals as artists are to become better at art in general, especially painting, drawing, and any hand drawn artwork. We gained confidence in 3D art in this project, and we gained confidence using certain materials that we had previously thought of as disgusting (such as papier-mâché). We will definitely use the knowledge we learned from this class in future projects and assignments, and we hope to gain even more confidence as artists in the future.
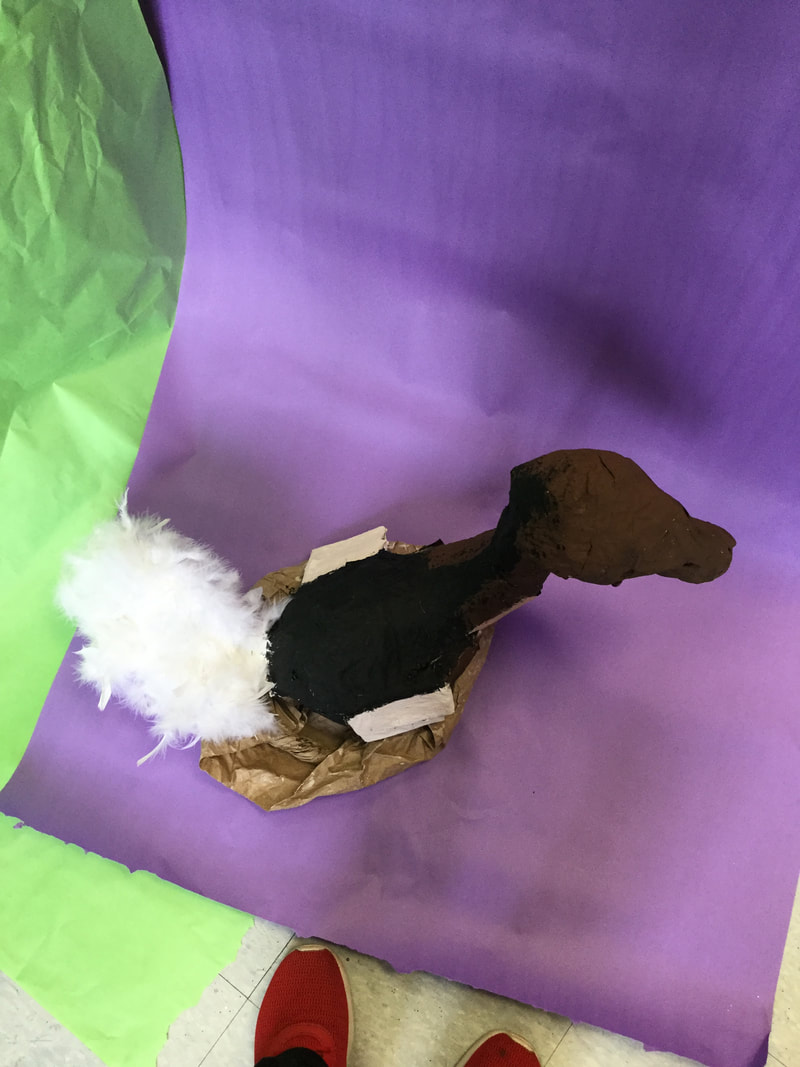
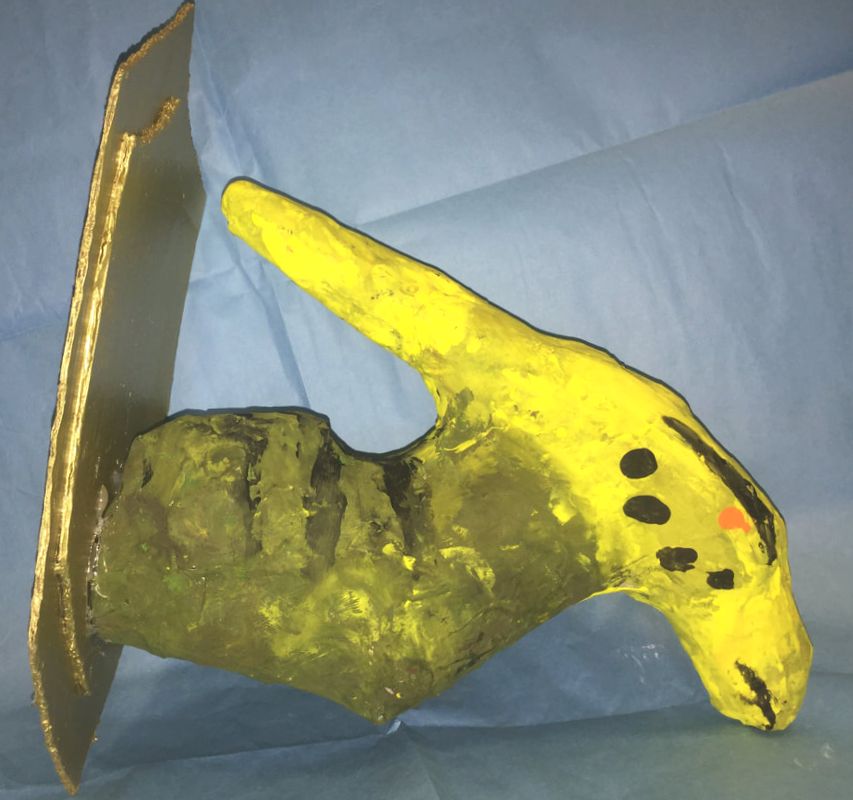
Oryx by Ian
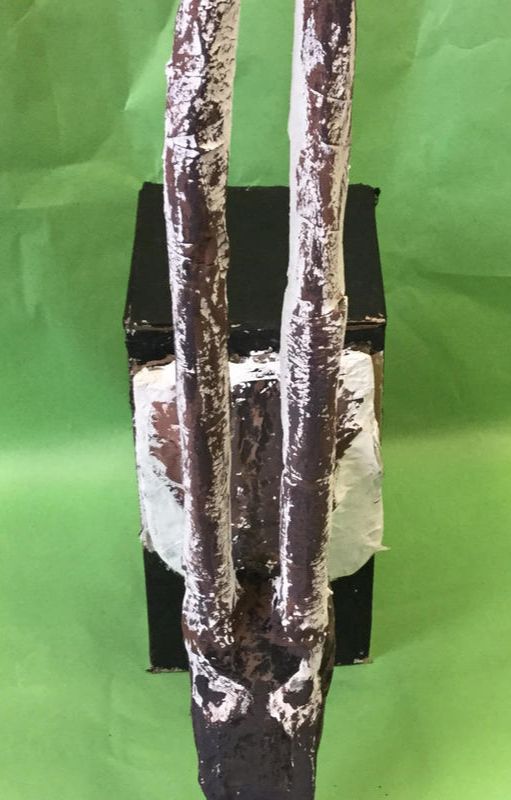
It has the characteristics of a goat and yet has a robust muscular body which thrives in the arid climate.
The oryx is a severely endangered species which has the genus of four large antelope species, it is native to arid parts of Africa and some parts of the Arabian Peninsula.
So what I first did was developed the head and neck by crumpling news paper, formed it and put it into position, then I taped and conjoined the two figures, after that I applied one layer of paper mache, and then applied the two base coats of white paint, then painted in the details. Definitely the texturing, accentuating the fur which is so crucial to any animals look. I learned that you have to use a small brush for detail, even if it is a large area.
I think it was to show the multitude of animals which are either extinct or endangered because of man made problems.
Life and Sustainability well, the in the United States of America the country as a whole is very well off and is yet facing a humanitarian crisis as regards to the immigration crisis which is currently surging mainstream media.
I don’t aspire or have too much passion as far as art goes. Unfortunately this project was encouraging as far the sculpting goes but yet repelled that courage when the detailing started. This project really helped me in the sculpting part of art, and this also helped me learn about texturing. Unfortunately it did not turn out as planned which was ultimately fathomable. This helped me in my sculpting skills which will lend to be useful in other courses of the sort.
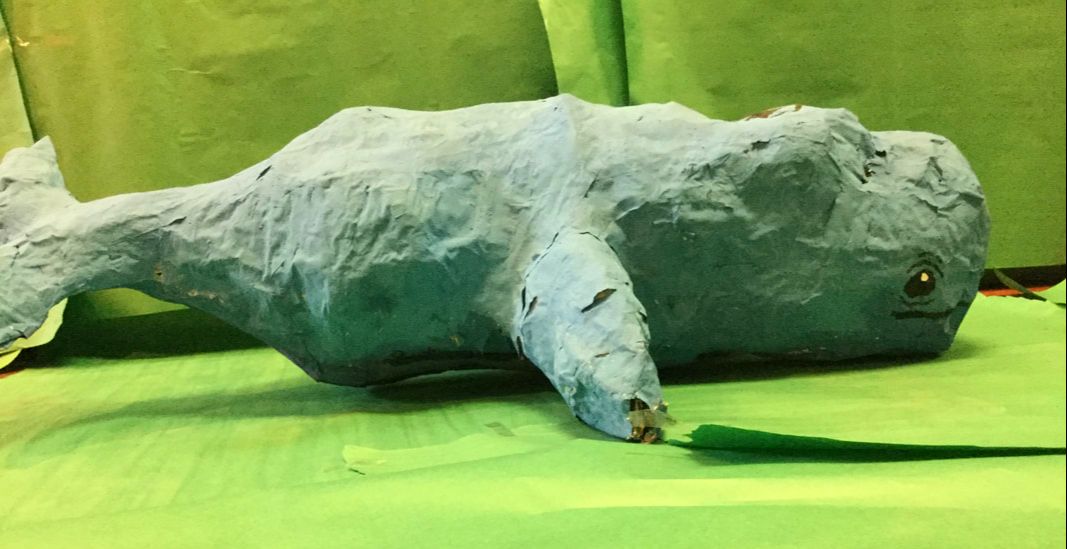
Blue Whale by Owen & Cooper
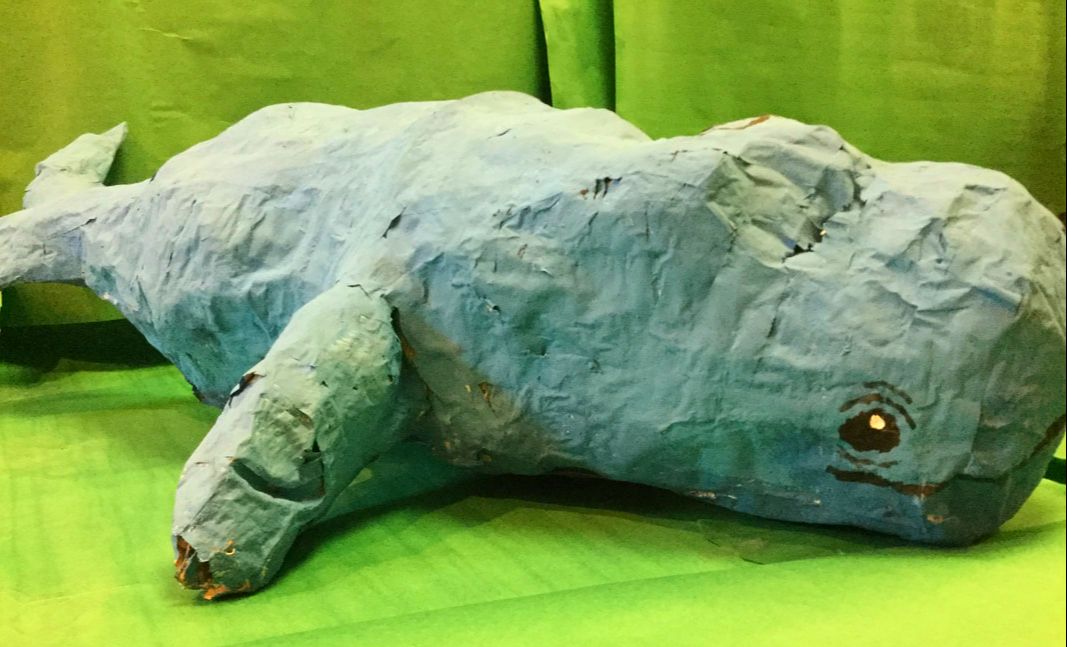
The Blue Whale looks like a very big fish but it is more round than other fish. One characteristic of the Blue Whale is that it is very big. The Blue Whale is endangered and lives in the northern Atlantic Ocean near the Arctic.
When we were working on our Blue Whale the first thing we did was we made an internal structure out of cardboard, then we filled the internal structure in with newspaper and masking tape, after that we put paper mache all around the outside of the Blue Whale then we painted it and when the paint was dry we added the eyes, and the mouth, and dry-brushed on the bottom of the Blue Whale it to add texture to the Blue Whale.
Our project inspired by the idea that all the resources on the planet are slowly being used up and someday the resources might disappear if we keep taking the resources and using them unsustainably.
In this art class we learned how to paper mache, and how to dry-brush. Our whale turned out more lumpy than we thought it would but overall we were successful making our blue whale. We could use our knowledge of dry brushing in other 3D art projects where we need to add the illusion of texture.
|
|
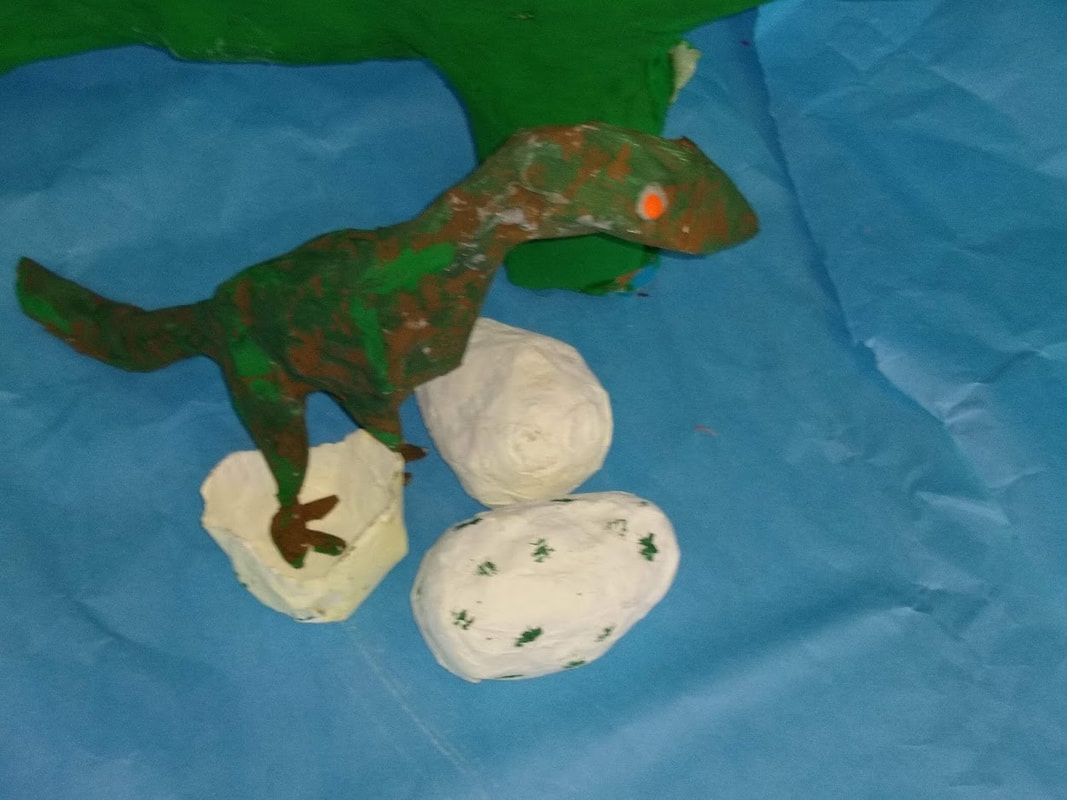
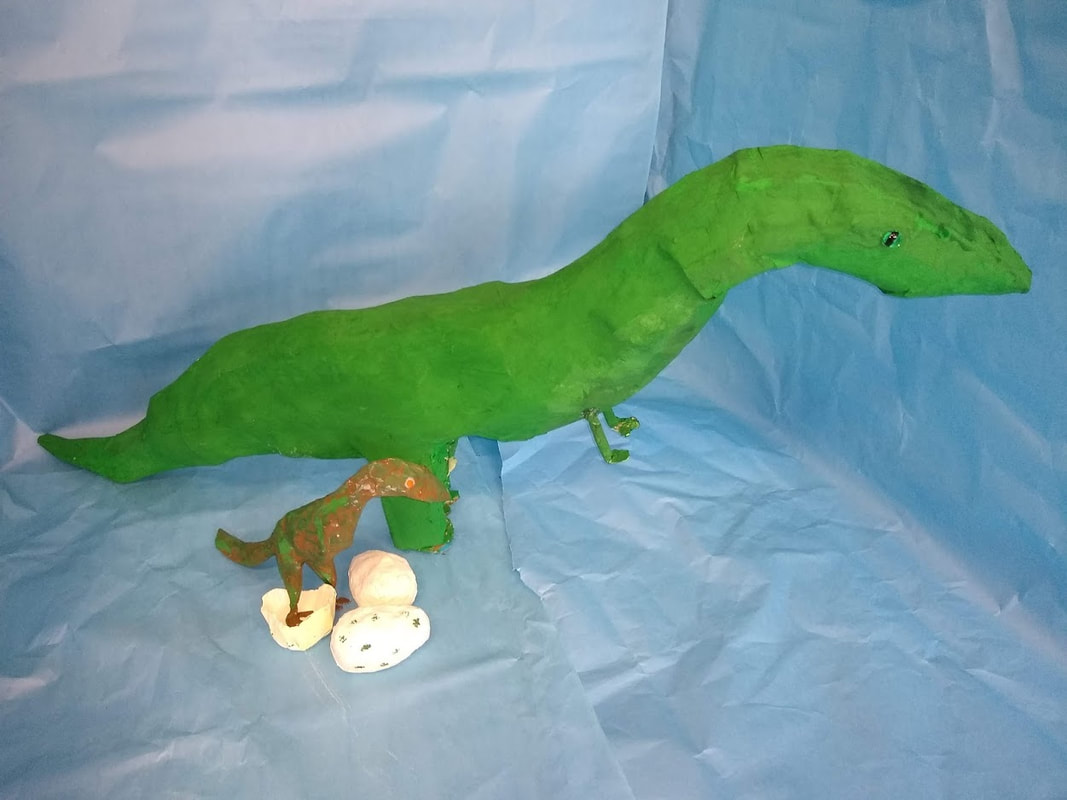
Miniasaripus by Eli and Henry
|
|
We did the miniasaripus, the smallest dinosaur. Only footprints have been found. At the beginning, we disagreed how to make the frame, and so we decided to do two different versions of the same dinosaur. He made a frame out of wire, and I made a frame out of cardboard. By the end of the first day, he had already finished his frame, and I had hardly started. In the end, The cardboard frame was finished, and it was a lot bigger than expected. Then we did the painting. Eli painted his camouflage colors, and I painted the big one a normal green.
by Natalie & Zakiya
|
|
